Chimney Flashing Repair: Stop Chimney Leaks Fast

Chimney leaks often start small but can quickly cause expensive damage to the roof and ceiling. When the metal flashing around your chimney fails, water can slip beneath your shingles and into your home. That is why chimney flashing repair should be addressed as soon as warning signs appear.
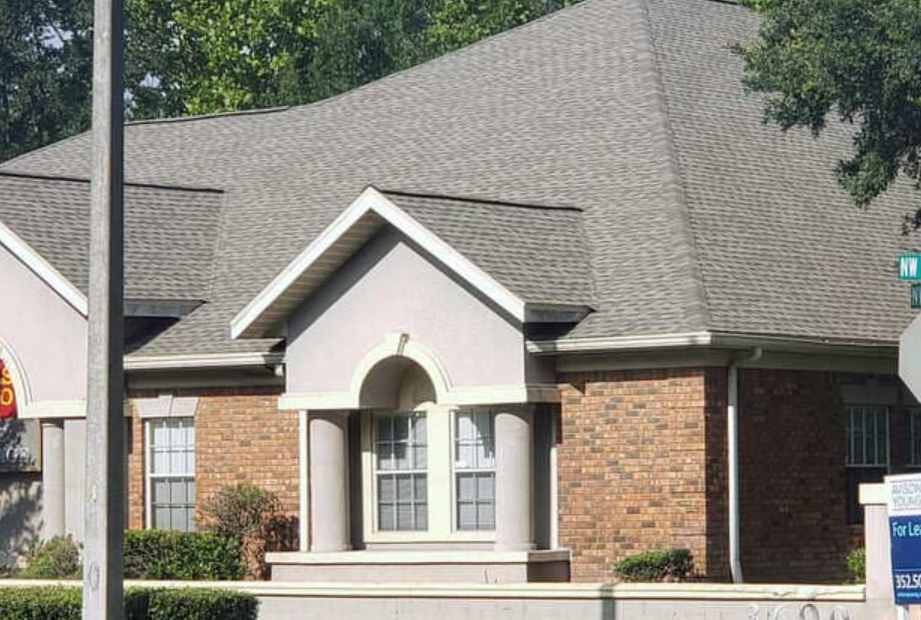
In North Central Florida, heavy rain and seasonal storms place constant stress on roofing systems. Energy Roofing Companies helps homeowners protect their roofs with proven solutions and is a GAF Master Elite® contractor, a designation held by only 2% of roofers nationwide.
In this guide, you will learn how chimney flashing works, what causes it to fail, and how to identify early warning signs. We will also walk through the basics of chimney flashing repair and simple steps that help prevent future leaks.
What Is Chimney Flashing?
Flashing is a protective metal system installed around the base of a chimney to prevent water from entering the gap where the chimney passes through the roof. Without this barrier, rain and melting snow can slip beneath shingles and penetrate the roof structure.
The flashing system works in layers. Each metal piece overlaps the one below it, guiding water down the roof instead of allowing it to seep into seams or joints. This layered design is what makes flashing effective at directing water safely away from vulnerable areas.
Without properly installed flashing, moisture can reach the wooden roof deck beneath the shingles. Over time, this can lead to ceiling stains, wood rot, and mold growth inside the home.
A properly installed flashing system forms a flexible seal that moves slightly as the home settles and temperatures change, while still preventing water intrusion.
Types Of Flashing Materials
Several metals are commonly used for chimney flashing, and each offers different advantages depending on budget and durability.
Aluminum flashing is lightweight and affordable, making it a popular choice for many homes. It resists rust but may corrode in coastal or harsh climates over time.
Copper flashing is one of the most durable options available. Although it costs more initially, copper develops a protective patina that slows corrosion and can last for decades.
Galvanized steel flashing offers a balance between strength and cost. The protective zinc coating helps prevent rust, though it will eventually wear away as the material ages.
Older homes sometimes contain lead flashing because it molds easily around irregular shapes. However, it is rarely used today due to environmental and health concerns. The right flashing material often depends on your local climate, roofing system, and long-term home plans.
Common Flashing Designs
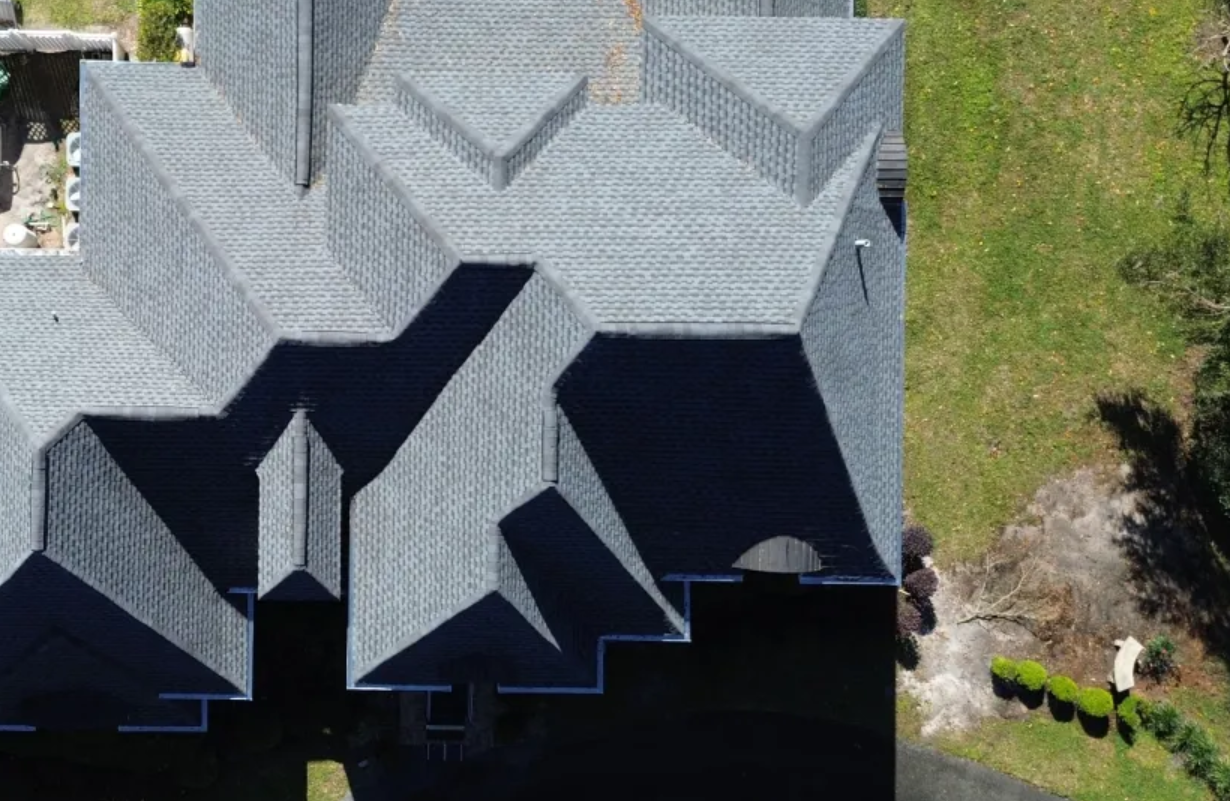
Chimney flashing systems use several overlapping components that work together to keep water out. Step flashing consists of L-shaped metal pieces installed along the sides of the chimney between each row of shingles. Each piece overlaps the one below it, so water flows downward along the roof surface.
Base flashing sits at the bottom of the chimney where it meets the roof. Its purpose is to catch water flowing down the chimney face and redirect it safely onto the shingles.
Counter flashing, sometimes called cap flashing, is embedded into the mortar joints of the chimney and overlaps the base flashing. This two-part system protects the seam while allowing slight movement between the roof and chimney.
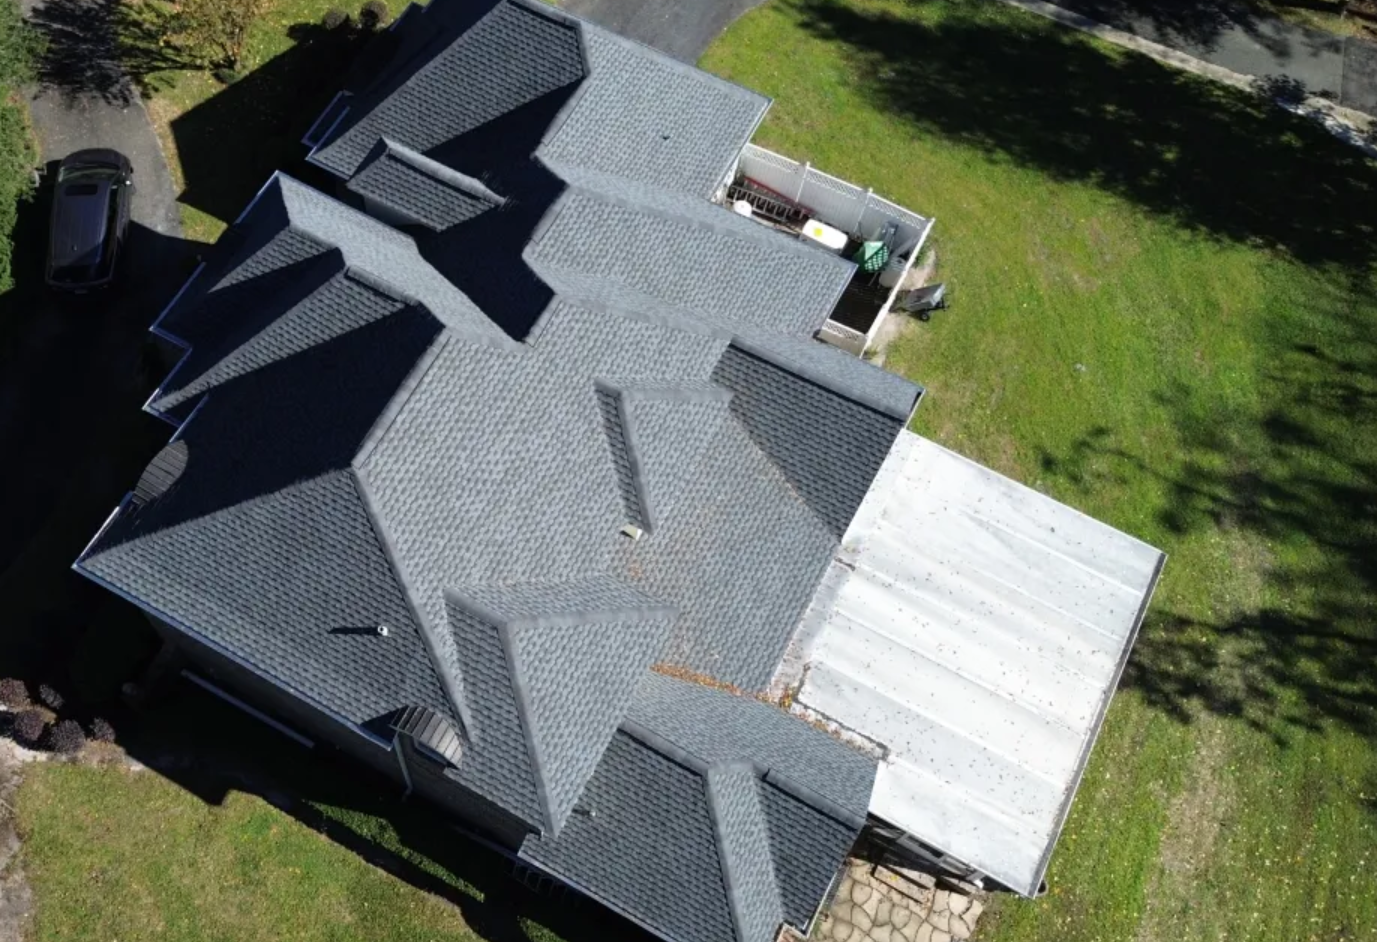
Some roofs also include a chimney cricket, which forms a small ridge behind the chimney on the uphill side. This structure redirects water and debris around the chimney instead of allowing it to pool behind it.
Causes Of Chimney Flashing Damage
Chimney flashing usually deteriorates due to weather exposure, installation errors, or natural aging. Each of these factors can weaken the seal between the chimney and roof, eventually allowing water to enter.
Weather-Related Wear
Chimney flashing is constantly exposed to rain, wind, snow, and temperature changes. Over time, these environmental conditions slowly weaken flashing materials and sealants.
During winter in colder regions, ice dams can form when melting snow refreezes near the roof edge. Water trapped behind these ice barriers can be pushed beneath flashing and shingles.
Repeated freeze-thaw cycles also cause metal flashing to expand and contract. This movement gradually loosens joints and weakens sealants.
Strong winds during storms can lift the edges of flashing or loosen nearby shingles. Once materials shift out of place, water can slip underneath and begin damaging the roof deck. Sun exposure also contributes to flashing deterioration. Ultraviolet rays slowly dry out roofing sealants, causing them to crack and lose flexibility.
Improper Installation
Incorrect flashing installation is one of the most common reasons homeowners need chimney flashing repair sooner than expected. A proper flashing system requires both base and counter flashing to work together. If one layer is missing or installed incorrectly, water can easily penetrate the system.
Improper overlapping of flashing pieces is another frequent mistake. Flashing must be layered carefully so water flows over each piece rather than entering seams.
Using the wrong fasteners or placing nails in incorrect locations can cause flashing to loosen over time. Additionally, mixing incompatible metals may lead to chemical reactions that accelerate corrosion.
Low-quality flashing materials can also bend or develop holes faster than thicker, professional-grade metals.
Aging And Material Deterioration
Even with professional installation and favorable weather conditions, chimney flashing will eventually wear out. Most flashing systems last 20 to 30 years before significant repairs or replacement become necessary.
Steel flashing may develop rust once its protective coating begins to break down. Once rust forms, it can spread quickly and weaken the metal. Copper and aluminum generally last longer but can still corrode under certain environmental conditions.
Sealants also deteriorate over time. As caulking dries and cracks, small openings develop that allow water to enter the roof system.
Temporary patch repairs often delay the problem rather than solve it completely. In some cases, repeated repairs create multiple layers of old flashing and sealant that trap moisture and accelerate damage.
How To Identify Flashing Issues
Detecting flashing problems early can prevent expensive structural damage. Both interior and exterior inspections can reveal signs that chimney flashing repair may be necessary.
Visible Signs Of Leaks
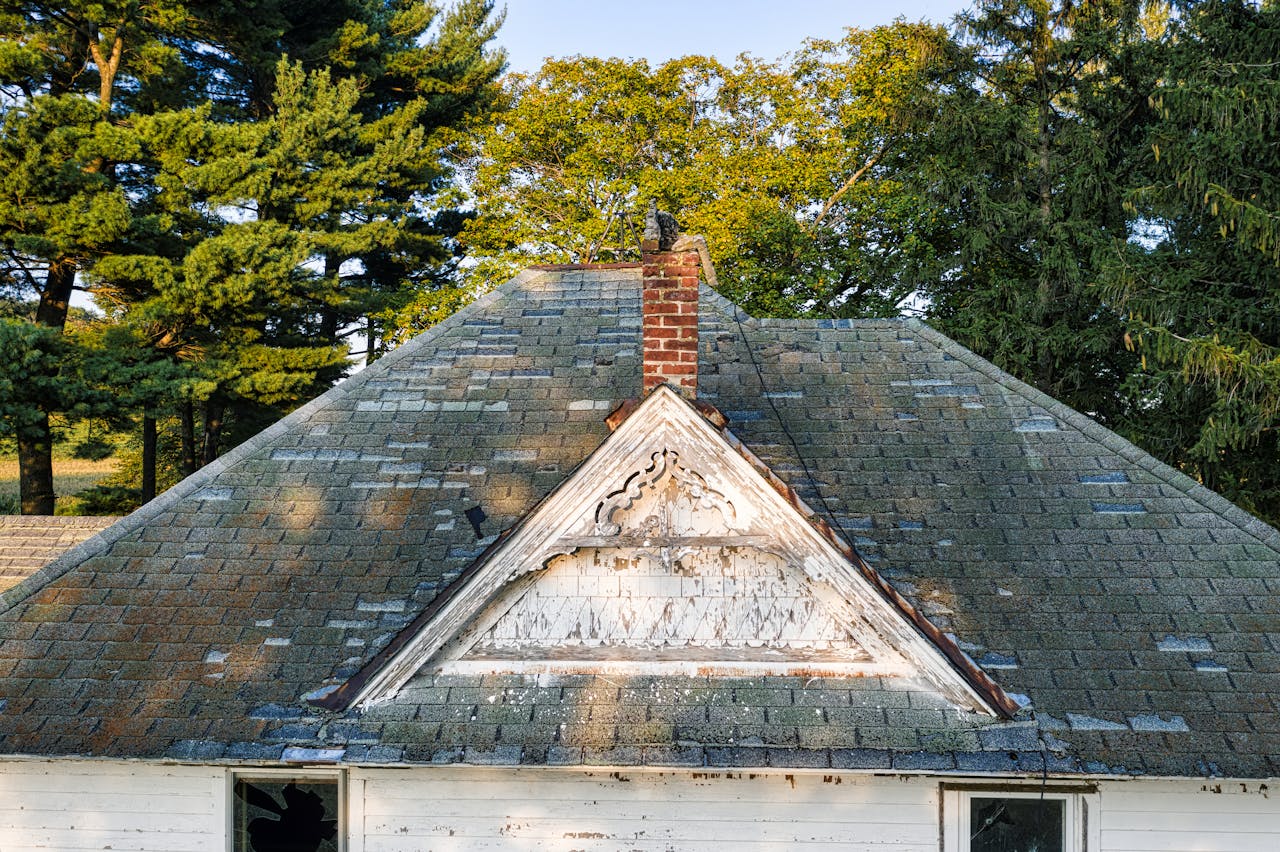
Water stains on ceilings or walls near the chimney are one of the most common signs of flashing failure. These stains typically appear as yellow or brown discoloration and may darken after heavy rain.
In the attic, homeowners may notice damp wood framing or water marks near the chimney. A persistent musty smell can also indicate long-term moisture intrusion.
Exterior inspections may reveal rust spots, cracks, or visible gaps between the flashing and chimney brick. Bent or missing flashing pieces are also clear indicators of damage.
Damaged shingles around the chimney base may also signal flashing problems. Sealant around flashing edges may appear cracked, brittle, or completely missing.
Inspection Tips
Inspecting chimney flashing twice each year can help catch small issues before they become major repairs. Spring and fall are ideal times for routine roof checks. If climbing onto the roof feels unsafe, binoculars can help you inspect the chimney area from the ground.
Pay close attention to these key components during inspection:
- Step flashing along the chimney sides
- Counter flashing embedded into mortar joints
- Base flashing at the chimney base
- A cricket or saddle behind the chimney, if present
It is also helpful to inspect your attic during or shortly after rainfall. Use a flashlight to look for fresh water stains or damp wood near the chimney framing. Carefully touching nearby wood can help determine whether moisture is present.
When To Seek Professional Help
Active leaks or visible water damage usually require professional roof repair. Waiting too long can allow moisture to spread through the roof structure and insulation. Professional help is also recommended when flashing shows multiple damaged areas or when the source of the leak is difficult to identify.
Flashing repairs require working on steep roof surfaces and properly integrating materials with the roofing system. Experienced professionals can complete repairs safely and ensure the flashing system performs correctly.
If your chimney flashing is more than 20 years old, scheduling a professional inspection can help identify hidden issues before they lead to costly damage.
Steps For Chimney Flashing Repair
Successful chimney flashing repair requires the right tools, careful preparation, and attention to detail. Proper removal and installation ensure the new flashing forms a reliable waterproof barrier.
Required Tools And Materials
Several basic tools are necessary for chimney flashing repairs. A flat pry bar helps remove old flashing materials and loosen surrounding shingles. A hammer is used to secure new flashing pieces in place.
Wire brushes are helpful for cleaning brick and mortar surfaces before installing new flashing. Tin snips allow flashing materials to be cut accurately to fit the chimney.
Homeowners or contractors will also need step flashing, base flashing, and high-quality roofing sealant. Polyurethane sealant or roofing cement is commonly used because it withstands outdoor conditions and temperature changes.
Rust-resistant roofing nails help secure flashing without causing premature corrosion. Safety equipment is equally important. Work gloves protect hands from sharp metal edges, while non-slip shoes help maintain stability on the roof surface. For steep roofs, a safety harness and rope are strongly recommended.
Preparing The Work Area
Proper preparation helps ensure the repair process goes smoothly and safely. Before beginning, check the weather forecast and choose a period with at least two consecutive dry days. Dry conditions allow sealant to cure properly and prevent slippery roof surfaces.
Position the ladder so it extends at least three feet above the roof edge for safe access. The ladder should rest on stable, level ground, and it is helpful to have someone nearby to steady it while climbing.
Remove debris such as leaves, branches, or dirt from the area surrounding the chimney. Keeping the work area clean improves visibility and reduces slipping hazards.
Nearby landscaping or patio furniture should be covered with tarps to protect them from falling debris. Keeping a bucket nearby for removed nails and flashing pieces helps maintain a tidy work area and reduces the risk of injury.
Removal Of Damaged Flashing
Before removing old flashing, take several photos of the existing layout. These images provide a helpful reference when installing new materials. Using a pry bar, carefully lift the shingles surrounding the chimney. Take your time to avoid damaging the shingles, which can be reused.
Remove the nails securing the old flashing and carefully detach each piece. It is usually best to start at the top of the flashing system and work downward.
After removing damaged flashing pieces, scrape away old sealant using a wire brush. Thoroughly cleaning the chimney and roof surfaces ensures the new flashing creates a tight, durable seal.
Preventing Future Chimney Flashing Problems
Routine inspections and proper waterproofing practices can significantly extend the life of chimney flashing. Consistent maintenance allows homeowners to address small issues before they develop into major repairs.
Routine Maintenance Tips
Scheduling a professional roof inspection at least once each year helps identify flashing problems early. Spring and fall inspections are particularly helpful because they follow seasonal weather changes.
Cleaning gutters regularly is another important step. When gutters become clogged, water may overflow and collect around the chimney area. After severe storms or strong winds, it is wise to inspect the flashing for potential damage.
Look for warning signs such as bent metal, gaps between flashing and brick, cracked sealant, rust spots, or loose fasteners. Trimming tree branches that hang over the roof also helps protect flashing. Falling limbs can damage metal components, while accumulated leaves can trap moisture near the chimney.
During roof inspections, it is helpful to ask a professional to evaluate the sealant around flashing joints. Sealants naturally wear out and typically require replacement every few years.
Waterproofing Solutions
Applying waterproof sealant to chimney mortar joints can help prevent moisture from entering the brick structure. This added protection reduces the chance of water reaching the flashing system.
High-quality polyurethane sealant applied along flashing edges improves durability and flexibility during temperature changes. Homes with chimneys located on sloped roof sections may benefit from installing a chimney cricket. This small structure redirects water away from the chimney and prevents pooling behind it.
Homeowners should also inspect their chimney cap periodically. A properly functioning cap prevents rain from entering the chimney flue and dripping onto the flashing from above.
Protect Your Home With Reliable Roof Care
Chimney leaks may appear minor at first, but damaged flashing can quickly lead to costly interior and structural damage. Addressing chimney flashing repair early helps protect your roof system and prevents long-term moisture issues.
Homeowners throughout North Central Florida face frequent rain, humidity, and seasonal storms that place extra stress on roofing systems. Energy Roofing Companies, a GAF Master Elite® contractor representing only 2% of roofers nationwide, understands how proper flashing installation and maintenance protect homes in this climate.
If you notice signs of a chimney leak or suspect flashing damage, a professional inspection can identify the source and recommend the right solution. Schedule a free inspection or call 855-766-3852 to have your chimney flashing and roof system evaluated.
Frequently Asked Questions
What Is Chimney Flashing?
Chimney flashing is the metal barrier installed where the chimney meets the roof. Its purpose is to seal the gap between these two surfaces so rainwater cannot enter the roof structure. Flashing is usually installed in layers, including step flashing and counter flashing. These pieces overlap to guide water safely down the roof instead of allowing it to seep into the joint.
How Do I Know If I Need Chimney Flashing Repair?
Common warning signs include water stains on ceilings near the chimney, rust on flashing metal, or visible gaps between the flashing and brick. You may also notice cracked sealant or loose flashing pieces during a roof inspection.
If leaks appear during heavy rain or the flashing looks damaged, chimney flashing repair may be necessary to stop water intrusion.
How Much Does Chimney Flashing Repair Cost?
Minor chimney flashing repair typically costs between $300 and $700. The final cost depends on the extent of the damage, roofing material, and whether surrounding shingles must be replaced. If flashing damage is severe or older materials must be removed completely, costs may increase due to labor and material requirements.
Can Chimney Flashing Be Repaired Without Replacing The Roof?
Yes, in many cases flashing can be repaired without replacing the entire roof. Localized repairs may involve resealing joints, replacing damaged flashing sections, or reinstalling step flashing. However, if the roof itself is nearing the end of its lifespan, a full roof replacement may be recommended so new flashing can be integrated properly.
How Long Does Chimney Flashing Last?
Most chimney flashing systems last between 20 and 30 years, depending on the metal used and environmental conditions. Copper flashing typically lasts longer than aluminum or galvanized steel.
Regular inspections and maintenance can extend the lifespan of flashing by catching small issues early.
Can I Do Chimney Flashing Repair Myself?
Small repairs, such as sealing minor gaps with roofing sealant, may be manageable for experienced homeowners. However, flashing repair often requires removing shingles and working safely on a roof. For larger repairs or active leaks, professional roofers are usually the safest option.
How Can I Prevent Chimney Flashing Leaks?
Preventive maintenance is the best way to avoid flashing problems. Annual roof inspections, keeping gutters clean, and replacing worn sealant can help protect the flashing system. Installing a chimney cricket on wider chimneys can also help redirect water away from the flashing and reduce long-term wear.
Related posts

What Gainesville Homeowners Miss in Post-Storm Roof Inspections
.jpg)
Summer Roof Maintenance Plans for Florida Homes

Roof Financing Options Florida Homeowners Should Understand

Pre-Listing Roof Inspection Tips for Gainesville Sellers
Florida Cracked Roof Tiles That Look Minor but Leak Big
Why Gainesville Roof Vent Leaks Start in the Attic First

Signs Your Florida Flat Roof Needs Professional Repair

Roof Tarping Emergency Steps for Florida Storm Nights
Understanding Hail Damage Roof Claims in Florida
.jpg)

Roof Insurance Claim Help for Florida Storm Seasons

Roof Ventilation Problems Florida Homeowners Overlook

When to Consider Roof Replacement in the Florida Climate
Ridge Vent Installation Guide for Better Attic Ventilation
Modified Bitumen Roofing For Flat & Low-Slope Buildings
GAF Timberline Shingles: Features, Cost, and Benefits

GAF Timberline HDZ: Complete Guide For Homeowners
EPDM Rubber Roofing: Benefits, Costs, and Installation

Dimensional Shingles: Boost Curb Appeal And Roof Protection

Clay Tile Roofing: Benefits, Costs, And Lifespan Guide
Chimney Flashing Repair: Stop Chimney Leaks Fast

Built-Up Roofing Guide for Flat Commercial Roofs
Best Roofing Material for Florida Homes: 2026 Guide

Why Attic Ventilation Matters For A Healthier Home

Standing Seam Metal Roof: Benefits, Cost, and Installation

Same Day Roof Repair: Fast Emergency Solutions For Your Home
Roofing Contractors In Ocala, FL: How To Choose With Confidence
Roofing Company In Ocala, FL: How To Choose A Trusted Pro
Roofers Gainesville, FL: How To Choose A Trusted Pro

Roof Repair In Ocala, FL: How To Choose A Trusted Contractor

Roof Repair In Gainesville, FL: Fast Help For Storms

Metal Roofing In Gainesville, FL: Durable Roofs That Cut Bills
Why Hiring A GAF Master Elite Roofer Matters

Corrugated Metal Roofing: Durable, Affordable Roof Guide

Best Shingles for Florida: Top Hurricane-Resistant Options

Architectural Shingles: Durable, Stylish Roofing Guide
24/7 Roof Repair: Fast Emergency Help When You Need It