Ridge Vent Installation Guide for Better Attic Ventilation
Poor attic ventilation can trap heat and moisture inside your home. Over time, this buildup can damage roofing materials, raise cooling costs, and create conditions for mold or wood rot. A proper ridge vent installation helps your attic release that trapped air and maintain healthier airflow.
In North Central Florida, high heat and humidity make attic ventilation especially important. Energy Roofing Companies offers professional roofing solutions designed to meet Florida Building Code requirements.
In this guide, you’ll learn how ridge vent installation works, the benefits it provides, and the steps involved in installing one correctly. We’ll also cover common mistakes and simple maintenance tips to help your ventilation system perform well for years to come.
What Is Ridge Vent Installation?
Ridge vent installation means cutting a slot along the peak of your roof and covering it with a vent system that allows hot air to escape from your attic. This creates a natural airflow system that works with your existing intake vents to regulate attic temperature.
Definition of Ridge Vent
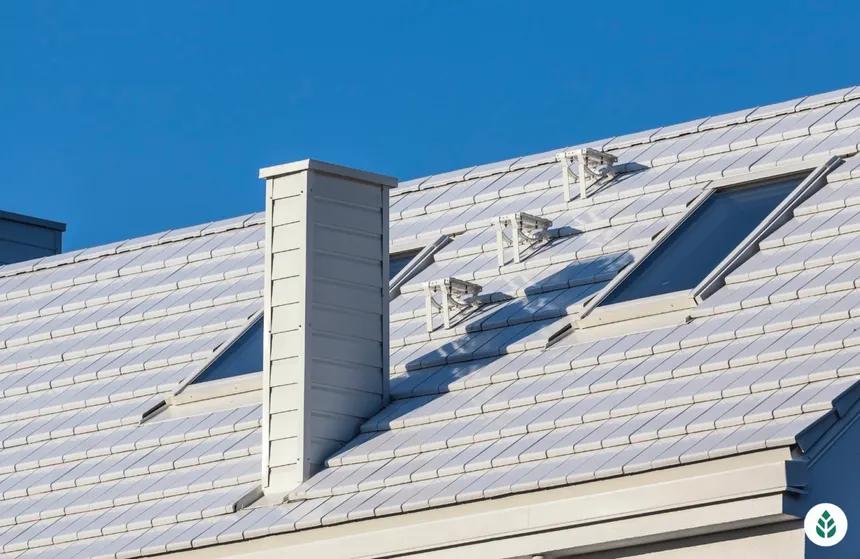
A ridge vent sits at the highest point of your roof where two sloped sides meet. It runs along the entire length of the roof peak, allowing hot, moist air trapped in the attic to escape.
The vent sits over a narrow slot cut into the roof deck. After installation, ridge cap shingles cover the vent so it blends with your existing roof.
Most ridge vents are about two inches wide and run continuously along the ridge line. During ridge vent installation, shingles near the peak are removed, the roof deck is cut, and the vent is secured over the opening.
Correct spacing and alignment with roofing materials are essential. Even small errors can affect airflow and weather protection.
Purpose of Ridge Ventilation
Ridge ventilation removes hot air that naturally rises to the highest point of your attic. As warm air escapes through the ridge vent, cooler air enters through soffit vents or other intake vents along the roof edge.
This process creates continuous airflow that helps keep attic temperatures closer to outdoor conditions. Proper ventilation reduces moisture buildup that can lead to mold growth and wood rot. It also helps roofing materials last longer by reducing exposure to extreme heat.
You may also notice lower cooling costs. With less attic heat radiating into your home, your air conditioner doesn't have to work as hard. In winter climates, ridge vents can also reduce the risk of ice dams by keeping the roof deck temperatures more consistent.
Types of Ridge Vents
Different ridge vent designs are available depending on your roof type and ventilation needs.
Aluminum Ridge Vents
Aluminum ridge vents are highly durable and resistant to corrosion. They perform well in areas that experience heavy rain, snow, or strong weather conditions, making them a long-lasting ventilation option.
Plastic or Vinyl Ridge Vents
Plastic or vinyl ridge vents are lightweight and typically more affordable than metal options. They still provide reliable airflow and are commonly used in residential roofing systems.
Shingle-Over Ridge Vents
Shingle-over ridge vents feature a low-profile design that is covered with ridge cap shingles. This allows the vent to blend seamlessly with the roof while maintaining continuous attic ventilation.
Off-Ridge Vents
Off-ridge vents are installed slightly below the roof peak rather than directly on the ridge line. They are sometimes used when roof design or structural limitations prevent the installation of a traditional ridge vent.
Each vent type is rated for airflow using net free area (NFA). Choosing the correct vent capacity ensures the system matches your attic size and intake ventilation.
Benefits of Installing a Ridge Vent
A properly completed ridge vent installation provides several benefits for your home's comfort, efficiency, and roof durability.
Improved Attic Ventilation
Ridge vents create continuous ventilation along the roof's highest point. This allows hot, stale air to escape naturally without fans or electrical systems. The process relies on natural convection. Warm air rises and exits through the ridge vent while cooler air enters through the soffit vents.
Because ridge vents run the full length of the roof peak, airflow spreads evenly across the entire attic. This prevents pockets of trapped heat and moisture. Balanced airflow improves overall temperature control and helps maintain healthy attic conditions.
Enhanced Energy Efficiency
Attic temperatures can exceed 150°F during summer without proper ventilation. Ridge vents release trapped heat before it transfers into your living space. With a cooler attic, your air conditioner uses less energy to keep your home comfortable.
During cooler months, ridge ventilation also helps control moisture buildup. Preventing condensation protects insulation so it stays dry and effective. Better insulation performance means improved energy efficiency year-round.
Extending Roof Lifespan
Excess heat and moisture can shorten the life of roofing materials. Ridge vent installation helps regulate attic conditions year-round. High attic temperatures cause shingles to expand and contract repeatedly. Over time, this cycle can lead to cracking, curling, and premature aging.
Moisture buildup can also damage wooden roof decking and rafters. It creates conditions where mold and mildew thrive. Proper ventilation helps prevent these issues by keeping air moving and removing excess heat and humidity.
Preparing for Ridge Vent Installation
A successful ridge vent installation starts with proper planning. You must confirm roof compatibility, gather the right tools, and follow safety precautions.
Assessing Roof Compatibility
Your roof must have a continuous ridge line where two slopes meet. This ridge is where the vent system will be installed. You should also confirm that your attic has adequate intake ventilation at the soffits. Ridge vents rely on airflow entering at the bottom and exiting at the top.
Most sloped roofs with asphalt shingles are good candidates. Very low-slope or flat roofs may require different ventilation systems. Measure your ridge length to determine how much vent material you need. Also, check your attic for existing vents such as gable vents or powered fans.
These may need to be sealed or removed because they can interfere with balanced airflow. Ideally, the intake ventilation area should closely match the exhaust ventilation area.
Required Tools and Materials
Basic Tools
- Circular saw or reciprocating saw
- Chalk line or straight edge
- Tape measure
- Hammer or nail gun
- Utility knife
- Pry bar
Materials Needed
- Ridge vent material (based on ridge length)
- Roofing nails (minimum 3 inches)
- Ridge cap shingles
- Roofing cement or sealant
- Baffles if needed
Most ridge vents come in 4-foot sections, so measure carefully to determine the quantity required. Purchasing ridge cap shingles at the same time helps ensure a consistent color match with the existing roof.
Safety Precautions
Roof work involves real risks, so safety should always come first during ridge vent installation. Taking the right precautions helps prevent falls, injuries, and damage to your roof.
Safety Checklist
- Wear rubber-soled shoes with strong traction and avoid working on wet or icy surfaces.
- Set up your ladder on firm, level ground and extend it at least three feet above the roof edge.
- Use a roof safety harness on steep roofs and secure it to a stable anchor point.
- Never work alone. Have someone nearby in case you need assistance.
- Choose the right weather conditions. Calm, mild weather provides the safest environment for roof work.
Step-by-Step Ridge Vent Installation Process
Installing a ridge vent requires careful measurements and proper placement to ensure effective ventilation and weather protection. Following each step in order helps prevent airflow problems and roof leaks.
- Mark the Ridge Line
Start by locating the exact center of your roof peak. Snap a chalk line along the ridge from one end of the roof to the other to create a straight guide.
Next, measure about one inch down from the peak on each side and snap two additional chalk lines parallel to the ridge. These lines mark the area where the ventilation slot will be cut.
Before moving forward, double-check your measurements. Straight, centered cuts ensure the ridge vent will sit properly and function as intended.
Checklist
- Locate the center of the roof ridge
- Snap a chalk line along the ridge peak
- Measure one inch down on each side of the ridge
- Snap two parallel chalk lines to mark the cut area
- Confirm measurements before cutting
- Cut the Roof Deck
Put on safety gear before beginning the cut. Set your circular saw blade depth to match the thickness of the roof decking, typically around three-quarters of an inch.
Carefully cut along the outer chalk lines while avoiding rafters or structural framing below. Remove any nails that fall along the cutting path. Once both cuts are complete, remove the section of roof decking between them. The opening should be clean, straight, and consistent along the entire ridge.
Checklist
- Put on safety glasses and gloves
- Adjust saw blade depth to roof deck thickness
- Cut along the outer chalk lines
- Remove nails along the cutting path
- Lift out the cut section of roof decking
- Check that the ridge opening is clean and even
- Install the Ridge Vent
Place the ridge vent directly over the slot you created. Most ridge vents come in sections that slightly overlap.
Start at one end of the ridge and work toward the other side. Secure the vent using roofing nails spaced about 12 inches apart on each side.
If multiple vent sections are required, overlap them by about six inches. This prevents gaps and helps keep water out. Make sure the vent sits flat and aligned along the entire ridge.
Checklist
- Position the ridge vent over the roof opening
- Begin installation at one end of the ridge
- Nail the vent every 12 inches on both sides
- Overlap sections by about six inches
- Confirm the vent sits flat along the ridge line
- Seal and Finish the Ridge
If recommended by the manufacturer, apply roofing cement beneath the vent edges before final fastening. This helps create a watertight seal.
Next, install ridge cap shingles over the vent to protect it from weather exposure. Each shingle should overlap the previous one by about five inches.
Once finished, inspect the ridge line carefully. There should be no visible gaps, loose materials, or misaligned shingles. A properly installed ridge vent should blend naturally with the rest of the roof.
Checklist
- Apply roofing cement if required
- Install ridge cap shingles over the vent
- Overlap each shingle by about five inches
- Nail caps securely through the vent and roof deck
- Inspect the ridge for gaps or loose materials
- Confirm the finished ridge matches the roof appearance
3 Common Installation Mistakes and How to Avoid Them
Even small mistakes during ridge vent installation can affect attic ventilation performance.
- Incorrect Sizing
Incorrect sizing is a common issue during ridge vent installation. The vent opening must match your attic’s ventilation requirements to allow proper airflow.
A widely used guideline is the 1:300 ventilation ratio, which means one square foot of ventilation for every 300 square feet of attic space. For example, a 1,500-square-foot attic typically requires about five square feet of total ventilation.
The ridge slot usually measures 1.5 to 2 inches wide on each side of the roof peak. If the opening is too narrow, airflow becomes restricted. If it is too wide, the roof deck can become structurally weaker.
Always review the manufacturer’s specifications before cutting to confirm the correct dimensions for the vent product you are installing.
- Poor Placement
Proper placement is essential for a ridge vent to work effectively. The vent must sit at the highest point of the roof, where rising hot air naturally collects.
Ridge vents also rely on intake ventilation, typically provided by soffit vents along the roof edge. Without intake airflow, the ventilation system cannot circulate air through the attic.
Avoid mixing multiple exhaust vents on the same roof plane. Installing ridge vents alongside box vents can cause airflow short-circuiting, which reduces ventilation performance.
It is also recommended to stop the ridge vent three to four inches from the gable edge to help prevent weather intrusion.
- Insufficient Fastening
A ridge vent must be secured properly to withstand wind, rain, and seasonal temperature changes. Most ridge vent systems require roofing nails spaced about 12 to 18 inches apart along both sides of the vent. The ridge cap shingles that cover the vent should also be fastened with at least two nails each.
Make sure the fasteners penetrate the roof deck by at least three-quarters of an inch. Nails that only grip the shingles may loosen over time and increase the risk of wind damage.
Maintaining and Inspecting Your Ridge Vent
Routine maintenance helps ensure your ridge vent installation continues to provide proper attic ventilation. Regular inspections and basic cleaning can prevent airflow restrictions and extend the life of your roof system.
Routine Inspection Tips
Inspect your ridge vent at least twice a year, ideally during spring and fall. Checking both the attic and the exterior roof helps you catch ventilation problems early.
Inspection Checklist
- Check the ridge line from inside the attic. Look for small lines of daylight, which indicate that airflow is moving through the vent.
- Inspect the exterior ridge vent. Look for cracks, lifted sections, or visible gaps along the vent line.
- Look for moisture inside the attic. Mold, condensation, or dark stains on roof decking may signal poor ventilation.
- Examine ridge cap shingles. Make sure they remain secure and properly sealed over the vent.
- Watch for debris buildup. Leaves or dirt along the ridge can restrict airflow.
Cleaning and Debris Removal
Debris can accumulate along the ridge and block airflow through the vent. Periodic cleaning helps maintain consistent ventilation performance.
Cleaning Checklist
- Remove leaves, twigs, and dirt from the ridge vent openings.
- Use a soft brush or leaf blower to clear debris safely.
- Avoid pressure washers, which can damage vent materials or force water under shingles.
- Check for bird or insect nests that may block ventilation channels.
- Remove heavy snow or ice buildup in colder climates to keep airflow open.
Keeping your ridge vent clean and inspected helps maintain proper airflow, protect your roof structure, and support the long-term performance of your attic ventilation system.
Protect Your Roof With Proper Ridge Vent Installation
Poor attic ventilation can trap heat and moisture, which may shorten your roof’s lifespan and raise energy costs. A properly completed ridge vent installation helps release that trapped air and keeps attic conditions balanced.
For homeowners in North Central Florida, Energy Roofing Companies provides roofing solutions designed to improve ventilation and protect your home through every season.
If you’re dealing with attic heat, moisture, or aging ventilation, it may be time for a professional inspection. Schedule a free inspection or call 855-766-3852 to have your roof and ventilation system evaluated.
Frequently Asked Questions
What Is Ridge Vent Installation?
Ridge vent installation involves cutting a narrow opening along the peak of your roof and covering it with a vent system. This allows hot, humid air to escape from the attic while keeping rain and debris out. The vent runs along the ridge line and is usually covered with ridge cap shingles. Once installed, it blends into the roof while continuously improving attic airflow.
Do Ridge Vents Work Without Soffit Vents?
No. Ridge vents work best when paired with soffit vents or other intake vents. The system relies on balanced airflow where cool air enters through soffits near the roof edge while warm air rises and exits through the ridge vent. Without intake ventilation, airflow becomes restricted and the ridge vent cannot perform properly.
How Long Does Ridge Vent Installation Take?
For most homes, ridge vent installation can be completed in a few hours. The exact time depends on the roof size, accessibility, and whether existing vents must be removed. Larger homes or complex roof designs may take longer. Professional installation during a roof replacement is often the fastest and most efficient approach.
Can You Install a Ridge Vent on an Existing Roof?
Yes. Many homeowners add ridge vents to improve ventilation on existing roofs. The process usually involves removing ridge shingles, cutting the ventilation slot, installing the vent, and replacing ridge cap shingles. However, the roof must have a continuous ridge line and adequate soffit ventilation for the system to work correctly.
How Do I Know If My Attic Needs a Ridge Vent?
Common signs include excessive attic heat in summer, moisture or condensation inside the attic, mold or mildew on roof decking, higher cooling costs, or premature shingle wear. A professional inspection can determine whether improved ventilation or ridge vent installation would benefit your home.
How Often Should Ridge Vents Be Inspected?
Ridge vents should be inspected once or twice each year, typically in spring and fall. During an inspection, check for debris buildup, damaged vent sections, or loose ridge cap shingles. Routine maintenance helps ensure the ventilation system continues working efficiently
Related posts

What Gainesville Homeowners Miss in Post-Storm Roof Inspections
.jpg)
Summer Roof Maintenance Plans for Florida Homes

Roof Financing Options Florida Homeowners Should Understand

Pre-Listing Roof Inspection Tips for Gainesville Sellers
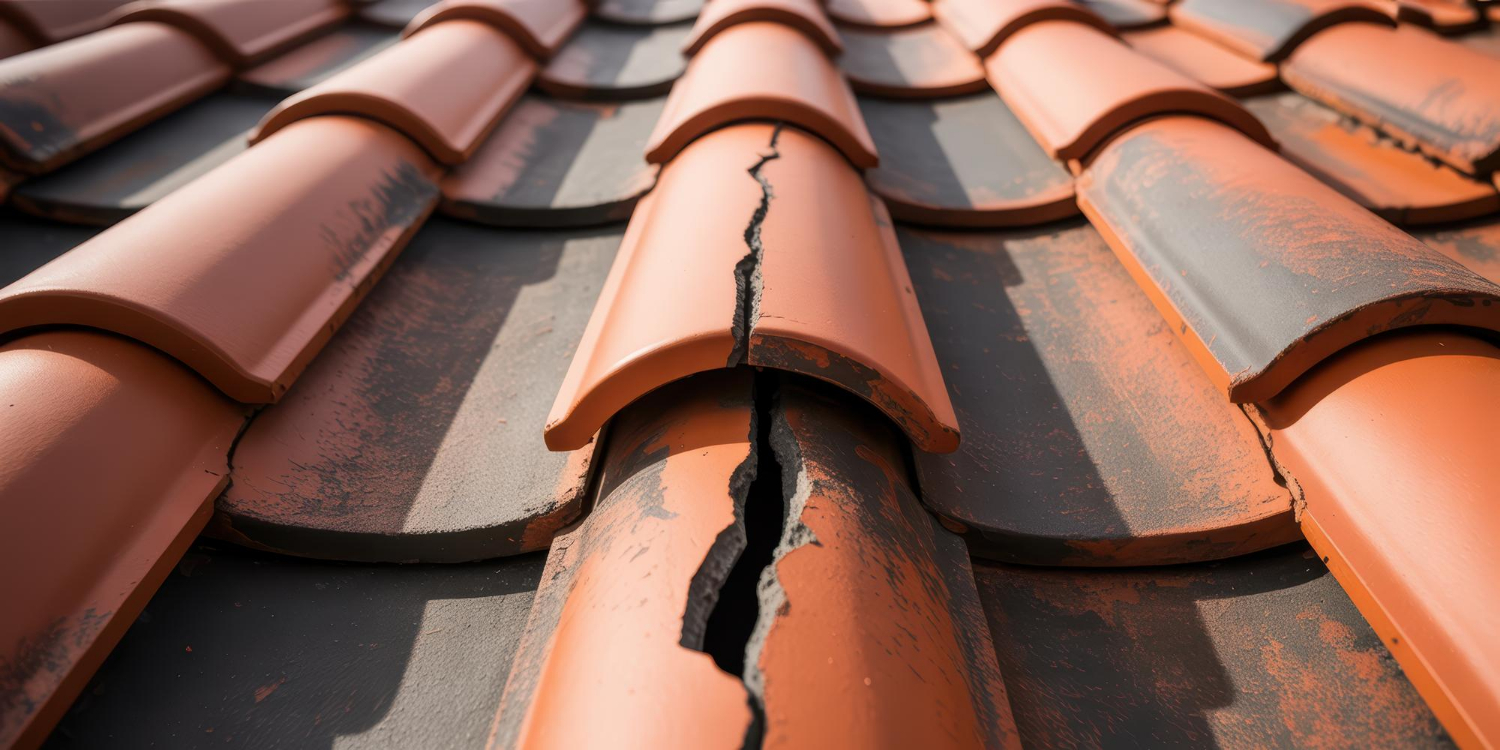
Florida Cracked Roof Tiles That Look Minor but Leak Big
Why Gainesville Roof Vent Leaks Start in the Attic First

Signs Your Florida Flat Roof Needs Professional Repair

Roof Tarping Emergency Steps for Florida Storm Nights
Understanding Hail Damage Roof Claims in Florida
.jpg)

Roof Insurance Claim Help for Florida Storm Seasons

Roof Ventilation Problems Florida Homeowners Overlook

When to Consider Roof Replacement in the Florida Climate
Ridge Vent Installation Guide for Better Attic Ventilation
Modified Bitumen Roofing For Flat & Low-Slope Buildings
GAF Timberline Shingles: Features, Cost, and Benefits

GAF Timberline HDZ: Complete Guide For Homeowners
EPDM Rubber Roofing: Benefits, Costs, and Installation

Dimensional Shingles: Boost Curb Appeal And Roof Protection

Clay Tile Roofing: Benefits, Costs, And Lifespan Guide

Chimney Flashing Repair: Stop Chimney Leaks Fast

Built-Up Roofing Guide for Flat Commercial Roofs
Best Roofing Material for Florida Homes: 2026 Guide

Why Attic Ventilation Matters For A Healthier Home

Standing Seam Metal Roof: Benefits, Cost, and Installation

Same Day Roof Repair: Fast Emergency Solutions For Your Home
Roofing Contractors In Ocala, FL: How To Choose With Confidence
Roofing Company In Ocala, FL: How To Choose A Trusted Pro
Roofers Gainesville, FL: How To Choose A Trusted Pro

Roof Repair In Ocala, FL: How To Choose A Trusted Contractor

Roof Repair In Gainesville, FL: Fast Help For Storms

Metal Roofing In Gainesville, FL: Durable Roofs That Cut Bills
Why Hiring A GAF Master Elite Roofer Matters

Corrugated Metal Roofing: Durable, Affordable Roof Guide

Best Shingles for Florida: Top Hurricane-Resistant Options

Architectural Shingles: Durable, Stylish Roofing Guide
24/7 Roof Repair: Fast Emergency Help When You Need It